How to Record a Saxophone
When considering how to record brass and reed instruments – and when recording saxophone in particular – the player and the tone he’s able to get from the instrument are vitally important. If you’re recording a professional with a lot of studio experience who knows how to get certain tones out of the instrument, you’re going to have a very different approach than if you’re in a home studio recording someone who’s new to the instrument and playing stacked notes.
In a recording situation, if you have the quality mics and pre-amps to do it, you should probably put more than one mic on the sax. With sax players, there’s typically a lot of movement and activity going on. A more professional player who is used to working in a studio setting might be able to stay still and work the mic, but in general, sax players tend to move around. So a good approach to get consistent dynamics and a full tone is to use multiple mics to balance the sound as the player moves around.
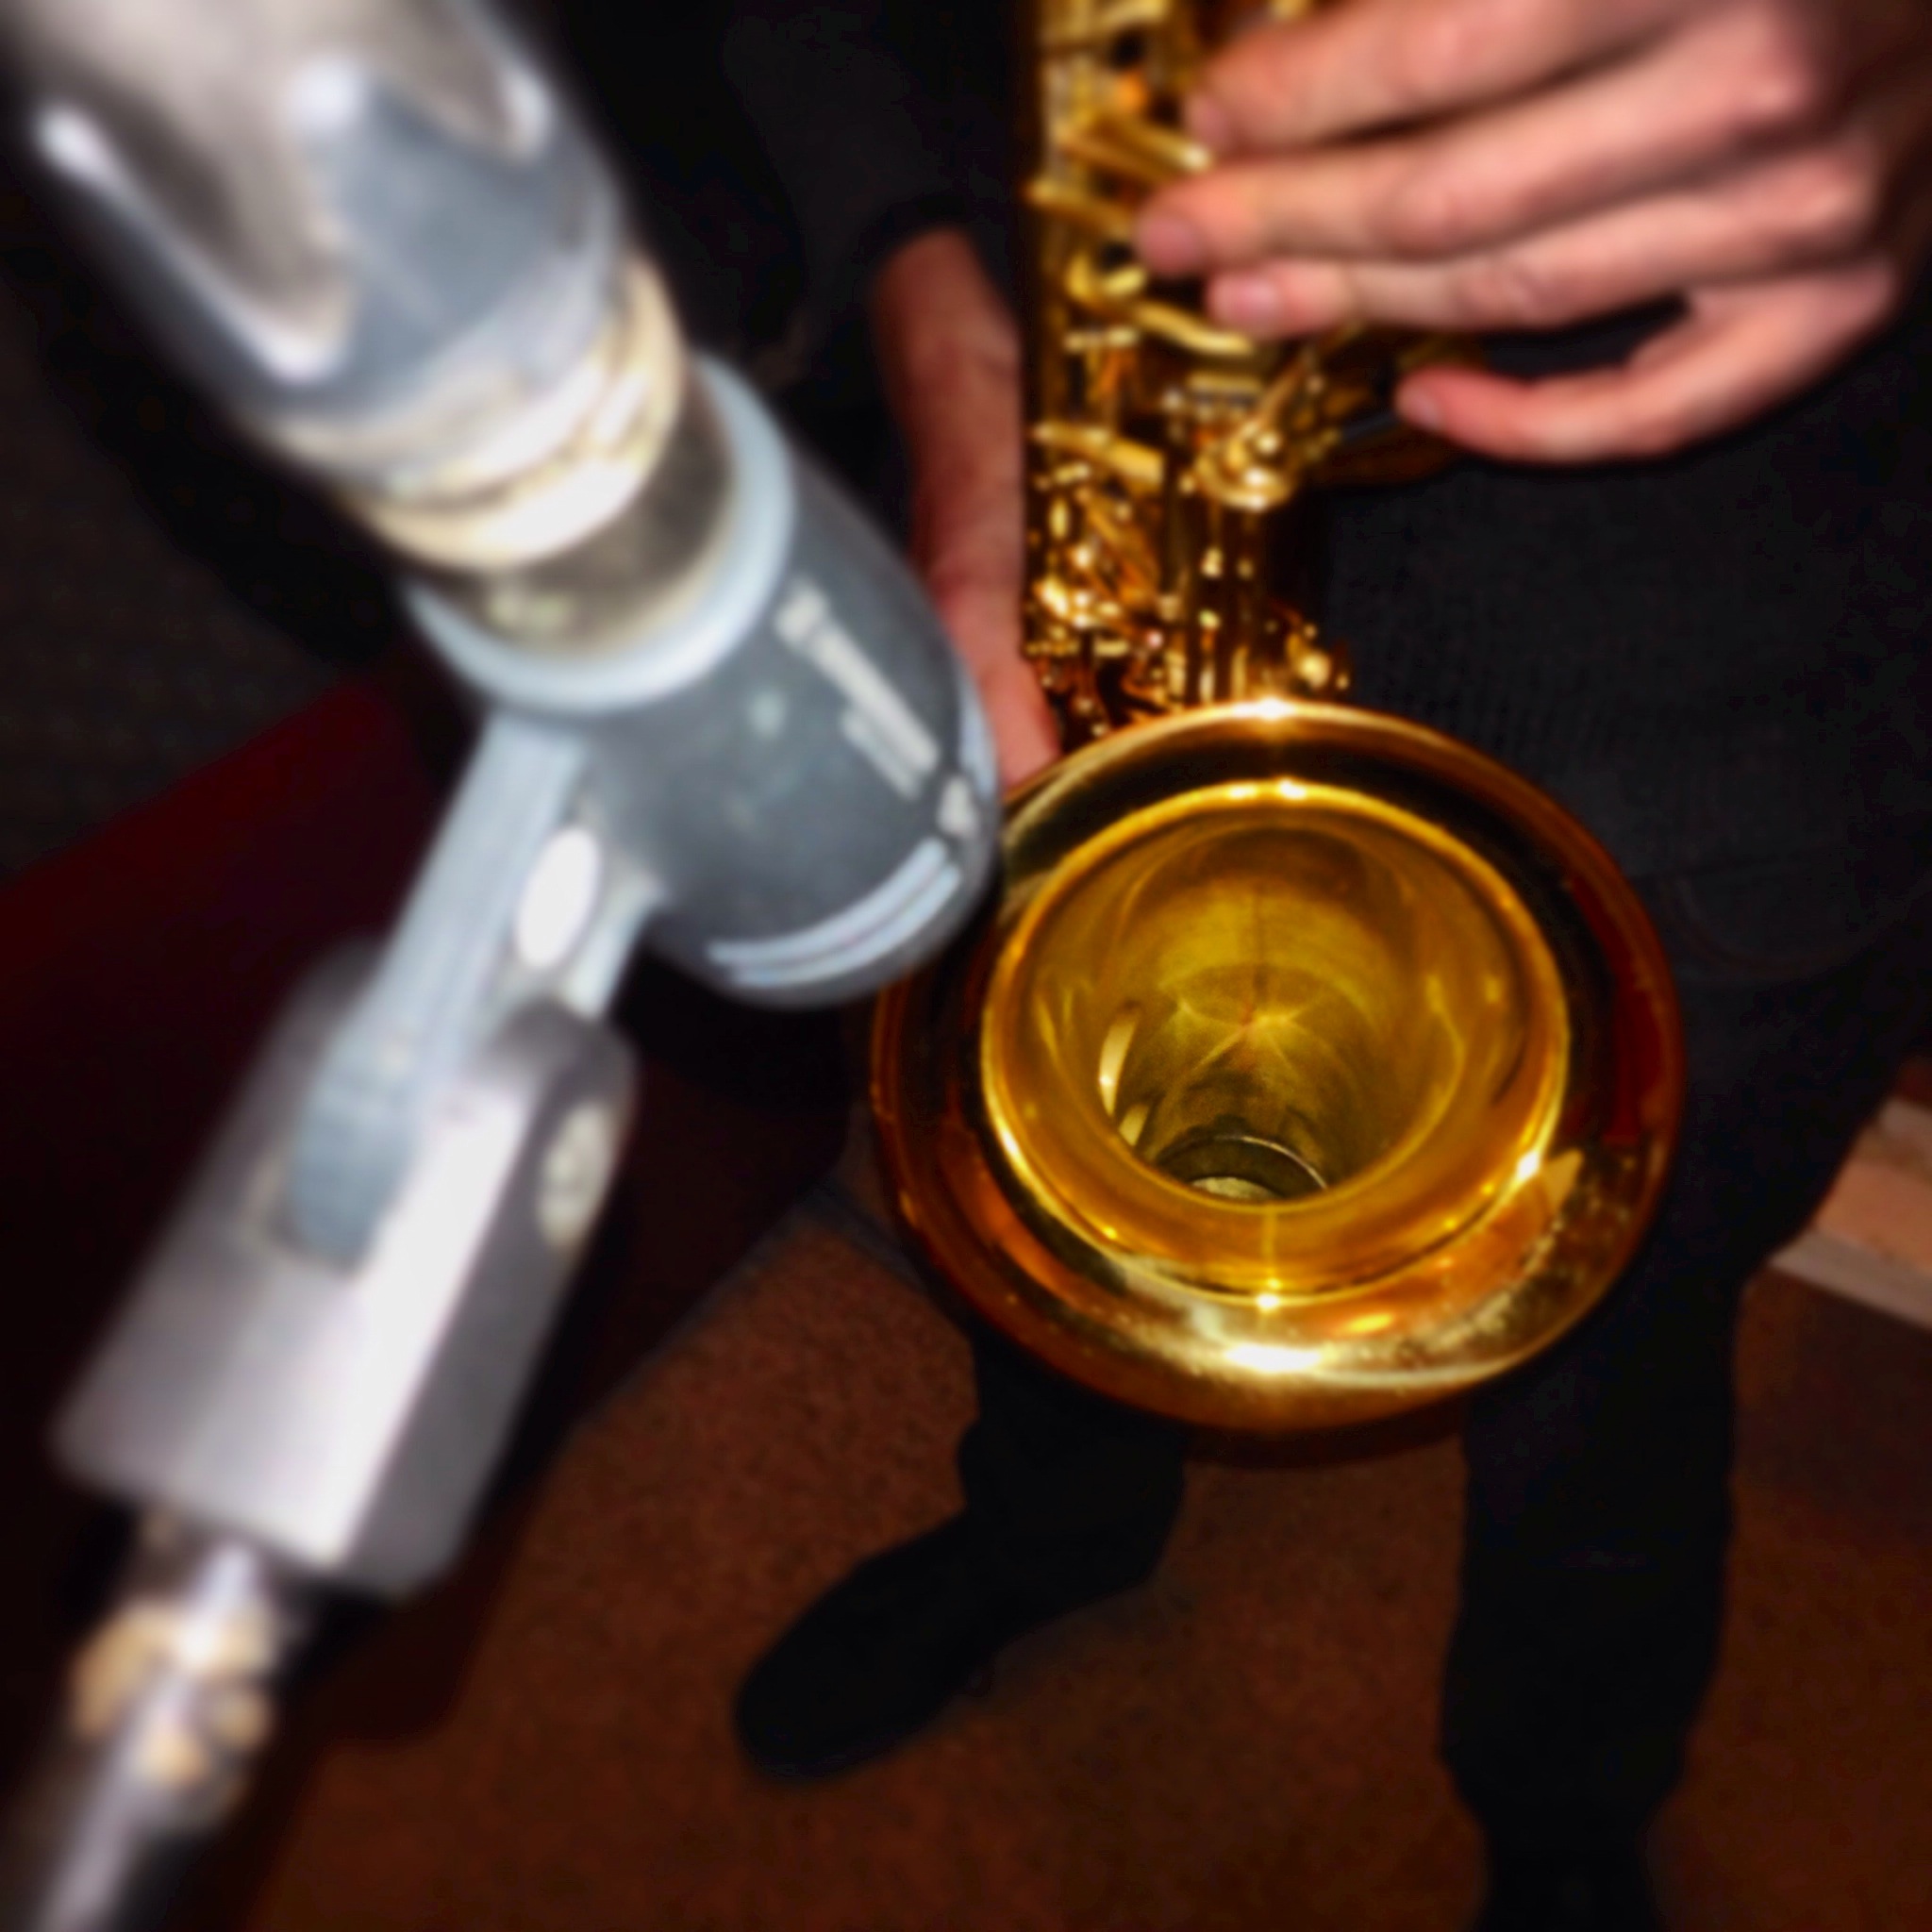
The most common approach is to start with a large-diaphragm condenser (LDC) mic about 10-15″ in front of the bell. If that sounds a little too harsh, or you want a softer tone, pull it out a little farther. Don’t point the mic directly into the bell, as you might get some wind noise or odd reflectivity back into the mic. Positioning the mic at different angles, start at about 45 degrees, can help remove the unwanted artefacts.
If your LDC mic has switchable pickup patterns, set it to a cardioid pattern to begin. You wouldn’t want a hyper-cardioid pattern due to the aforementioned movement and activity. Set it somewhere between cardioid and omni if your mic has a variable pattern selector. In some cases, if the room sounds great, you might even want to put the mic in omni. You’re going to get a less focused sound in omni, you’ll get more of the room sound, which may be what you’re after. The tighter the pickup pattern, the more directional the mic’s going to be, and the more focused the sound.
A great approach for a second mic is to put a ribbon microphone above the player, a good 3-4 feet above the instrument. A ribbon mic has a way of taking the harshness out of brass and reed instruments.
If you’re in a studio situation where you only have one mic, move the mic around the room. Put headphones on and be in the room with the sax. Move the mic around the sax until you find the sweet spot where you’re getting the tone you’re looking for.
In some cases, you’re not looking for that perfect tone. You already have your mix, you’re recording a sax solo, and you need it to rip through the mix, so you already know what instruments you need this to sit on top of. Move the mic around the horn to find that sound you need to get the right presence from the sax. In some instances, you’re stacking tracks to get harmonies and a full horn section type of sound, and in those cases, you don’t want something squeaky and midrange present. If you want something softer, move further away from the bell.
There are situations where you’re going to want a real natural sound. Like in jazz, you’re going to want a little more room noise from that ribbon mic overhead, so you get a little of the key noise. In a really poppy record, you just want to hear that screaming sax, so you might focus more on your primary mic in the front and less on the room mic.
If the sax is a big part of the song, you can play with the mic placement and put one over to the side and get a wider sound. Talk to the sax player and get tips from him. Find out how he’s liked his sax mic’d in the past.
If you’re in a room that’s small or doesn’t have great acoustic control, you’ll probably get a lot of resonant frequencies from a sax. Certain notes you hit are going to scream in the room. Using some type of baffle around the mic is highly recommended, to keep the energy concentrated and dampened around the mic. An sE Electronics Reflexion Filter will work great for cutting sax or vocals in a small studio. For anything that’s loud and in a very small room, it focuses the energy right into the mic and removes a lot of the reflections and resonant frequencies.
Another tool to aid in recording sax is to use an audio compressor. Sax tends to be very dynamic, so the same approach you might use on vocals also works great for smoothing out the dynamics of sax.
All in all, these techniques are just suggestions on how to approach recording a sax. Don’t get too tied up in the technical aspects. Use your ears, and if you like what you hear, go with it.